Want to make a super cute bracelet like this? Here's a quick tut!
Paracord is what attaches a parachute to the skydiver. It is called 550 paracord because one strand can hold 550 pounds. These are also called survival bracelets because they can be used in emergency situations. There are 7 inner strands that can be taken out and used to make many things, including a fishing net in emergency situations. They are pretty cool! You can do any colors, show your pride with your favorite team colors, show support for a cause by using those colors. What a great fashion statement!
Supplies:
Paracord (Measure your wrist and do 11 or 12 times that amount)
Buckle
Tweezers (not pictured, I have pointy ones)
Scissors
Lighter
Price:
~$13.00 The paracord is sold in 50, 100, and 1000 foot spools. I always buy 100 ft and you can make several bracelets out of that size. Prices vary, but expect to pay about $12.00 for 100 ft. The more you buy, the cheaper the price by the foot. The buckle was $1.00 at the local military surplus store, but you can probably find it cheaper online. You probably have the rest in your house.
Step One:
Cut the paracord the correct lengths. About 12x your wrist size. (be sure to include the .5 inch or so for the buckle in that measurement.) Fold the cord exactly in half.
Step two:
Lace the buckle. Do the side that you have to lace first.
Lace the other side by weaving it through and wrapping it around like so.
It will look like this after you lace the buckle.
Step three:
How to make a paracord knot. This is usually called a cobra stitch.
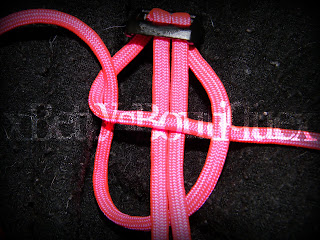
You will have to practice this, it took me a while. To explain, from here, the left is '1', the middle is '2' and the right is '3'. Take strand one and lay it across strand 2. Take strand 3 and lay it over 1. Take 3 and lace it BEHIND 2 ad through the loop of 1. It will look like this before tying it tightly.Pull tighter
Pull all the way tightly and do it again. You will keep the same strand on top. (3) the whole weave. So you will go back and forth, the first time the left strand will be on top, then the right strand, then the left. After a few stitches, the weave will look like this:
When you get to the end of the bracelet, it will look like this:
Step four:
At the end, on the inside of the bracelet, use your tweezers to stretch hole near the end, a stitch or two in.
Make it a decent sized hole:
Pull the ends of the paracord through.
Step five:
The paracord will look like this after it is lace through.
Cut it close to end, just leaving a centimeter or two.Step six:
Melt the ends. This will keep the bracelet together.
Use the lighter (I like candle lighters) to push the ends down. Try to get them molded together so it won't come undone, and make sure it is smooth so it doesn't scratch your wrist.
That's it! They look great and can come in pretty much any color you can imagine. If you would like to purchase one, I sell them at my etsy and fb shops.


No comments:
Post a Comment